Home ... Guides
Warping Your Mini Inkle Loom
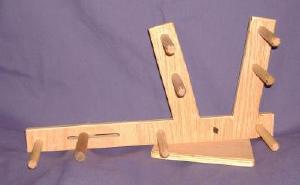
This guide is designed and laid out for warping and weaving on the Palmer Mini
Inkle Loom, can also be used as a general guide for our other sizes of inkle looms.
These directions are easily adaptable to other brands of inkle looms.
These are the same basic directions I use when teaching classes at SCA events,
Renaissance Faires, LARP, and other classroom opportunities. Contact me for
information on having a class at your school or event.
Pre make your heddles using a good quality upholstery thread or waxed linen, as
these materials will allow your warp threads to move easily. Avoid wool or other
fuzzy type threads as they cause knotting and felting. The shuttle that came with
your Palmer Loom is also your gauge for making your heddles. Your heddles are
re-usable so be sure not to throw them away when you are done with your project.
These heddle directions are specific to our loom design, and may not work with
other looms due to design differences.
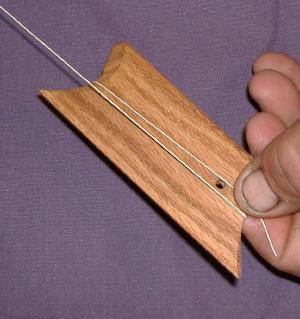
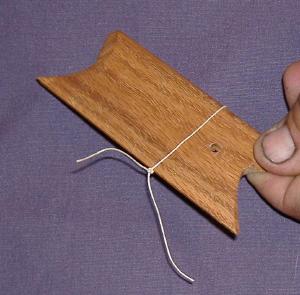
To begin making your heddles, wrap your thread around your shuttle length wise,
one round for each heddle needed.
For this particular pattern you will need 10 heddles.
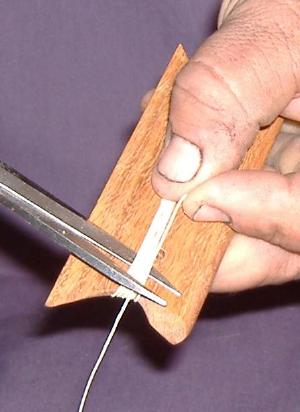
When you have all your rounds on the shuttle, cut across the loops at one end to
free the individual lengths of the heddle threads.

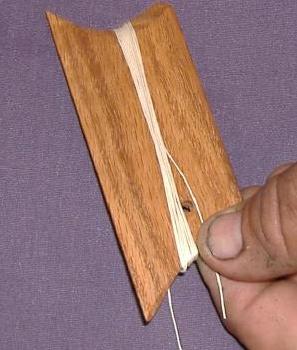
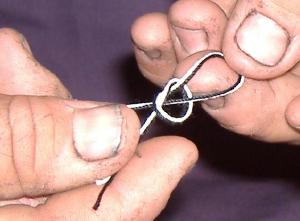
Tie each individual thread around the shuttle the short direction, using a square
knot, securing with a third knot. A square knot is made by tying right over left then
left over right, the third securing will be right over left.
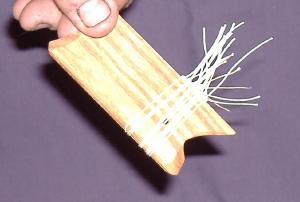
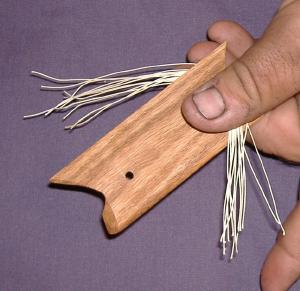
Continue tying the heddle threads around the shuttle until all threads are used.
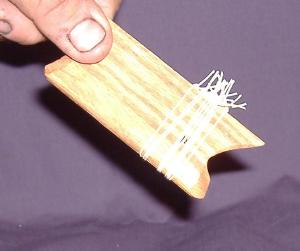
Then clip the ends to avoid tangling, but not too close, leave about 1/4 inch long
tails. After removing the heddles from the shuttle you can use a single drop of
super glue on each knot to set the knots.
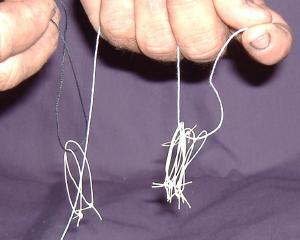
The pattern we will be working with here is a basic ladder pattern, consisting of
straight line sides and alternating bars in the middle. Choose two contrasting
colors of standard cotton crochet thread, one light and one dark. Pre load your
heddles onto your thread, 2 heddles on the dark and 8 heddles on the light.
Tie a slip knot with both strands together.
Set your tension peg about 1/4 of the way from the front end of the slot. On the
classroom model use the second tension hole.
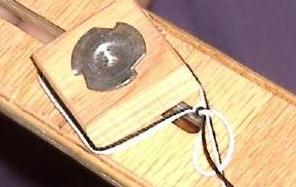
Attach the slip knot around your tension peg nut, (on the classroom model just slip it
on the tension peg), then bring your threads around the bottom to the front peg on
the working side of your loom. The pattern we are making today is a simple bar or
ladder pattern.

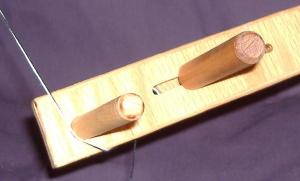
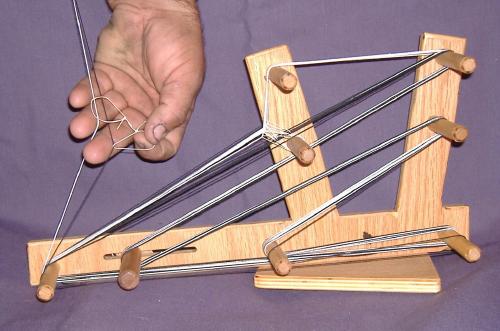
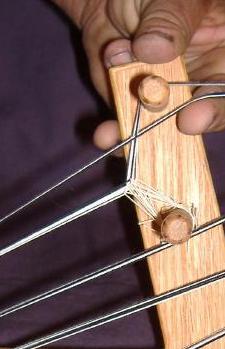
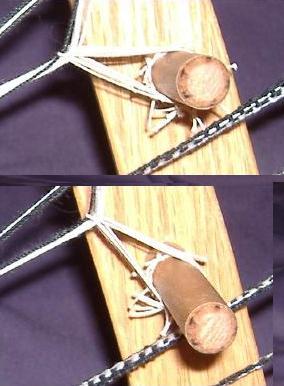
Take your first heddle on your dark thread and attach to the heddle peg as shown,
position the heddle knot on the bottom side of the peg. The second heddle on your
dark thread will be the last heddle placed on loom, and you can just slide this heddle
down the thread as you warp the loom to keep it out of your way until needed.
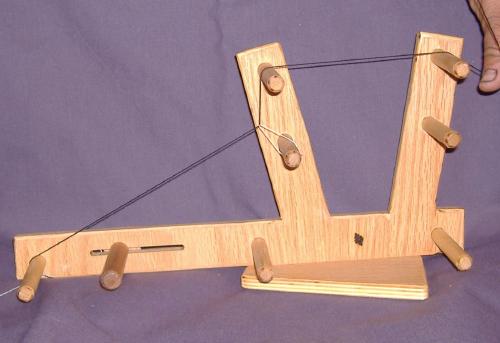
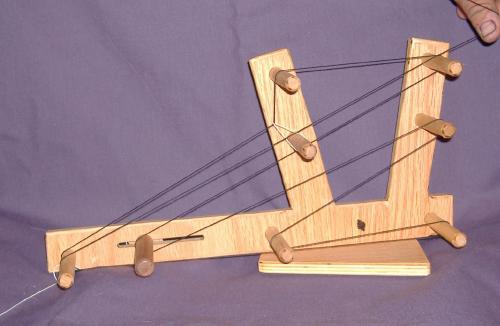
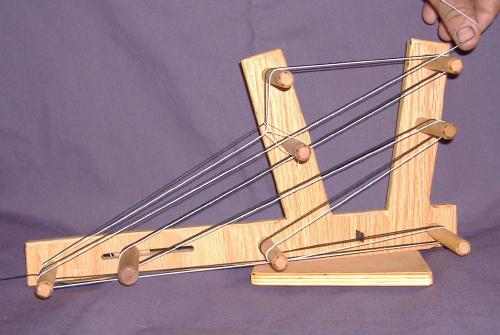
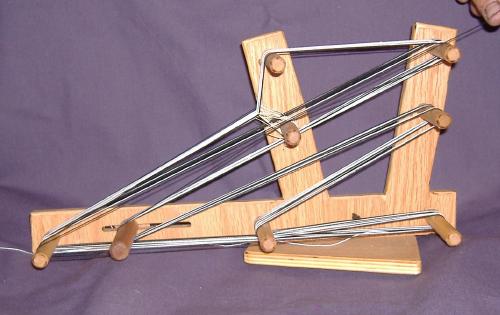
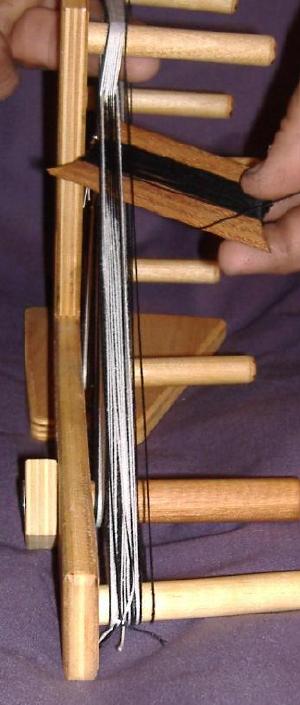
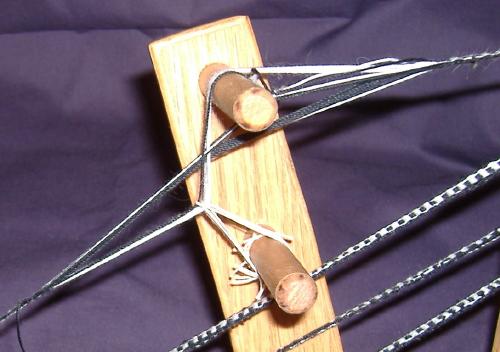
Take your dark thread over the top of the first top peg and around the rear top peg.
After going around the rear top peg go down to the tension peg and around, be sure
to stay below the heddle peg and always go around your pegs from top to bottom.
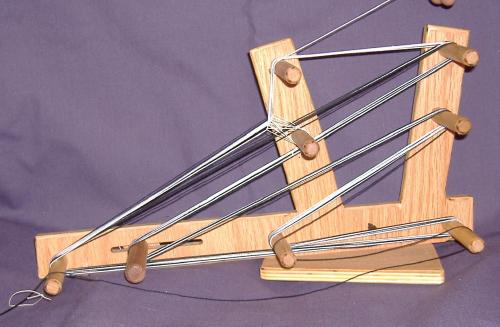
After going around the tension peg go back up to the middle rear peg and around.
Then go down to your center peg and around, then to the bottom rear peg and
around to the front peg, as seen in picture. This is your warping path for all odd
numbered (heddle, 1 - 3 - 5 - etc.) threads. Remember to always go around your
pegs from top to bottom.
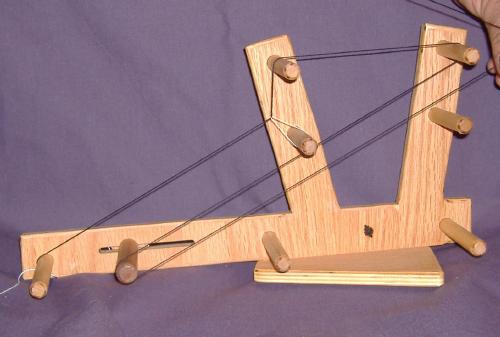
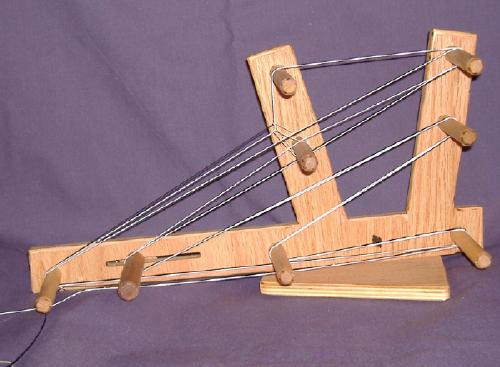
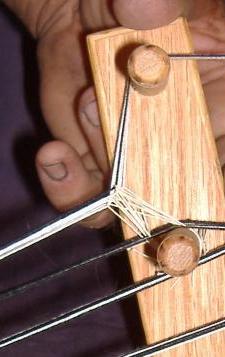
Still working with your dark thread, come around the front peg and go straight to
the rear top peg. At this point your thread should be between the two pegs on
your front arm.
From the rear top peg continue on the same path as the first thread. This is your
warping path for all even numbered (2 - 4 - 6 - etc.) threads. These two threads will
determine the color of the edge of your weaving. Creating a straight line of solid
color. This is also the color thread you will use to fill your shuttle.
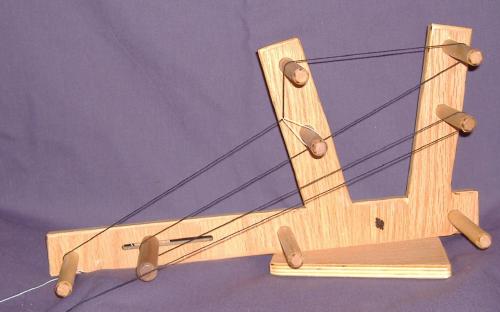
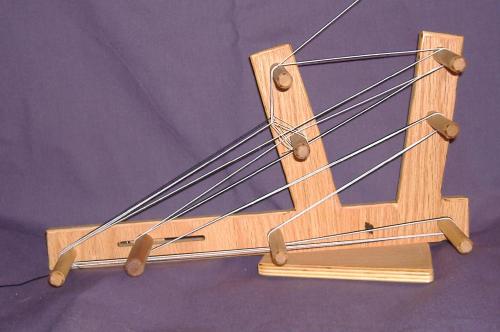
Take your first heddle on your light thread and attach to the heddle peg as shown,
position the heddle knot on the bottom side of the peg. The other heddles on your
light thread will be placed on loom as needed, and you can just slide these heddles
down the thread as you warp the loom to keep them out of your way until needed.
This is your warping path for all odd numbered (heddle, 1 - 3 - 5 - etc.) threads.
Remember to always go around your pegs from top to bottom.
Still working with your light thread, come around the front peg and go straight to the
rear top peg. At this point your thread should be between the two pegs on your front
arm. This is your warping path for all even numbered (2 - 4 - 6 - etc.) threads.
These two threads will determine the color of the outer stripe for your ladder.
Creating a straight line of solid color.
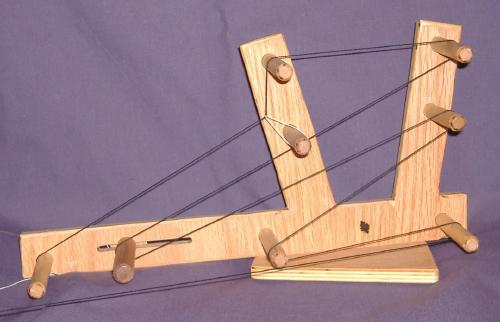
The fifth thread will be a light with heddle, follow the odd warping pattern.
The sixth thread dark no heddle, follow the even warping pattern. Alternating the
threads in this manner allows you to have the alternating bar colors.
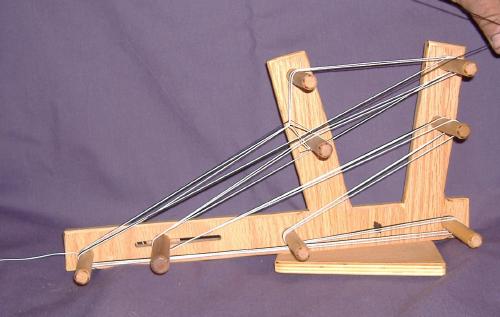
Continue adding odd and even threads as above until you have only one heddle on
each color of thread.
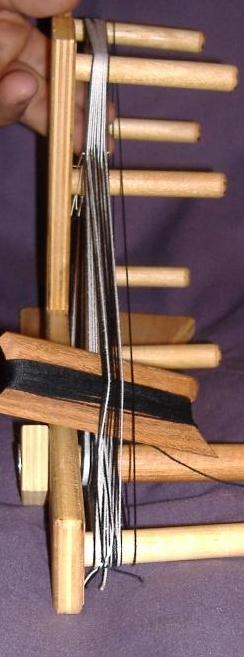
Add the last light thread with heddle.
Add one more light thread no heddle.
Add the last dark thread with heddle.
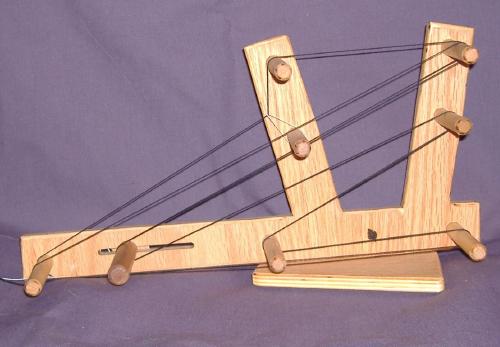
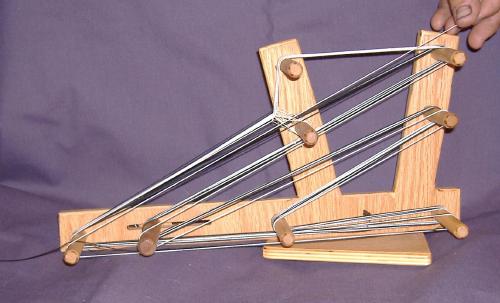
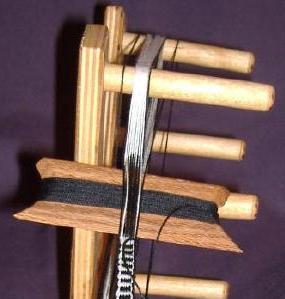
Add the last dark thread no heddle, this is the end of adding thread, to your warp.
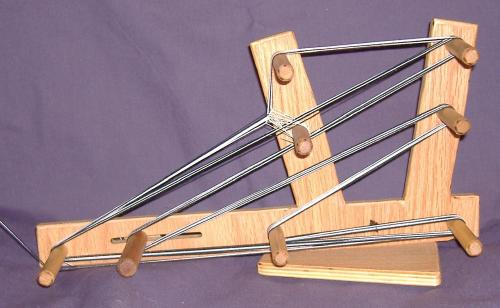
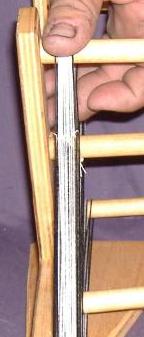
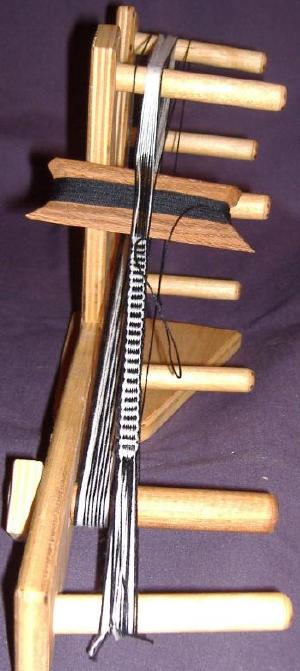
Your loom should look like the picture above.
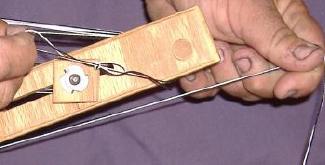
Remove the slip knot from the tension nut or peg and tie off the first 2 threads with
the last 2 threads.
Be sure not to tie the threads to the peg, use a secure knot, then trim the
excess thread.
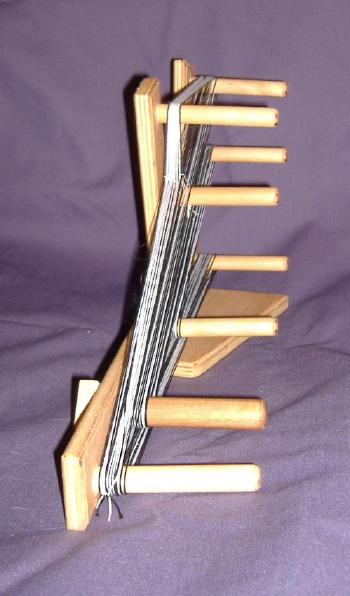
Your loom warped and ready to weave.

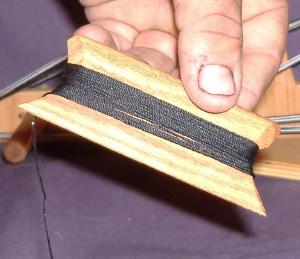
Fill your shuttle with the dark thread, start with the end of your thread through the
hole in the shuttle. Wrap a good amount of thread on the shuttle, the amount will
vary with the size of thread used. You can always add more if needed.
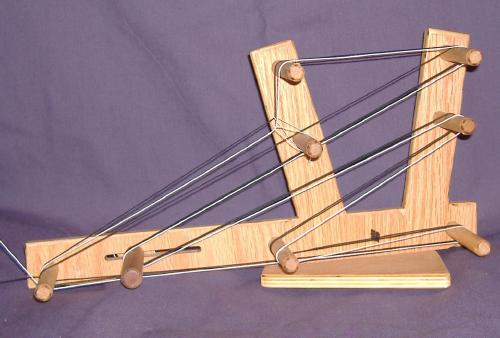
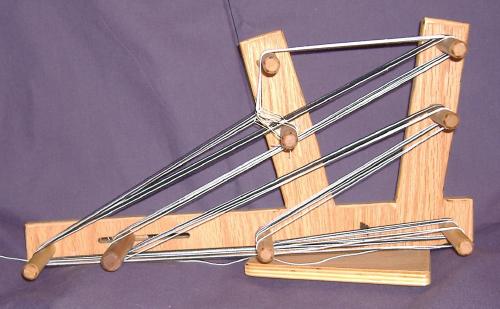
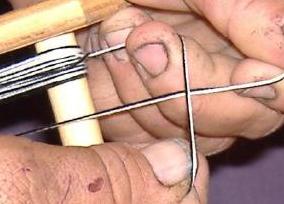
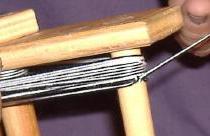
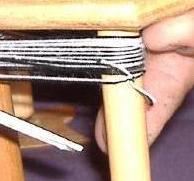
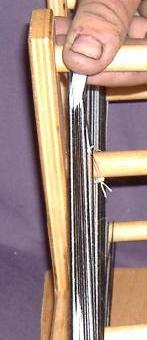
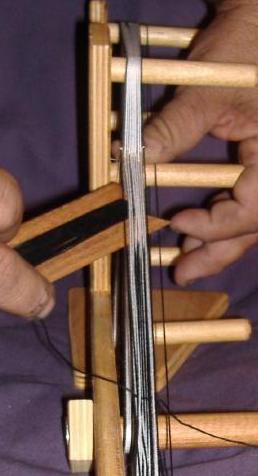
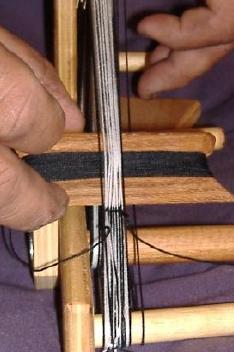
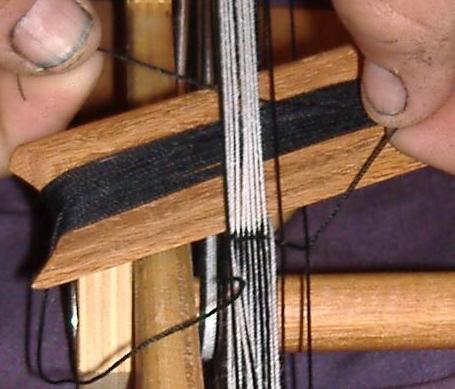
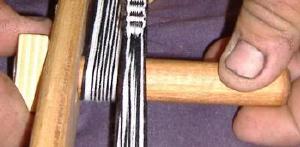
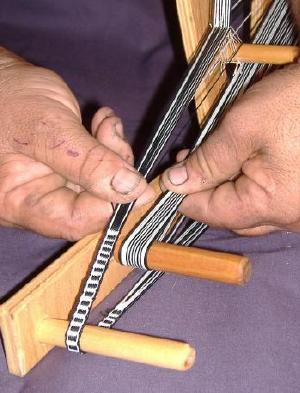
To change your shed reach with your left hand behind the front arm and either lift
or push down on the even numbered threads. In the pictures above you can see
the two different positions for the shed. On the left is the shed above the odd
numbered threads and the right shows the shed below the odd numbered threads.
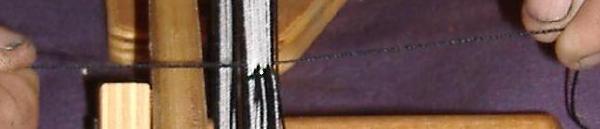
Before you start to weave you will need to check your tension. The easiest way is
to change your shed, if you get a clean color change your tension is good. Your
outside edges should remain dark with the middle threads going from all light to a
column of light with dark centers. Your tension should be good at this point, if not
you can re-adjust by loosening the nut and moving the tension peg towards the
front of the loom.
(For the classroom model just move your tension peg to the first hole.)
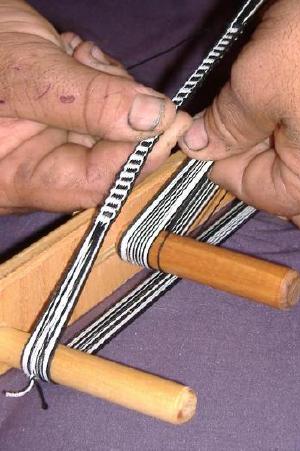
Start by lifting the even threads with your left hand, going point first insert your
shuttle into the shed with your right hand, once your shuttle is in the shed you
can remove your left hand, and slide the shuttle down towards the front peg.
Do not go beyond the frame of the loom with your shuttle. Now pull your shuttle
through leaving a 3 inch tail of thread on the right hand side of the loom.
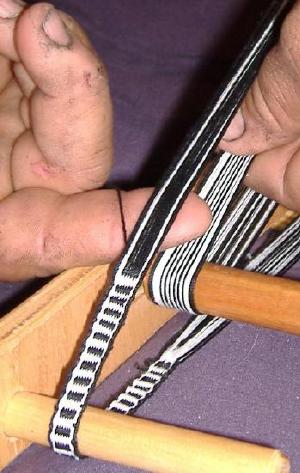
Next, push down on the even threads with your right hand and going point first
insert your shuttle once again into the shed with your left hand, once your shuttle
is in the shed you can remove your right hand, and slide the shuttle down towards
the front peg until it meets the previous stitch.
Leave your shuttle in place at this time.
Without removing the shuttle keep the shed open and pass the tail you left on the
previous stitch back through the shed.
Pull your shuttle through. Grasp the loose thread and the thread on the shuttle and
pull gently in opposite directions, until all your center threads are showing your light
color. This secures your tail and it can now be trimmed off, leaving about 1/2 inch.
Your next stitch will be right to left. Lift the shed with your left hand and insert your
shuttle point first through the shed. Slide the shuttle down to meet your previous
stitch making a straight bar. This is where you will beat down on the weaving to
tighten and straighten your previous stitches, you will do this with each shuttle throw.
Your next stitch will be left to right. Push down the shed with your right hand and
insert your shuttle point first through the shed. Slide the shuttle down to meet your
previous stitch making a straight bar. This is where you will beat down on the
weaving to tighten and straighten your previous stitches, you will do this with each
shuttle throw.
Repeat these two steps alternating right and left, until you reach a point where you
can no longer make a shed for the shuttle to fit through.
Leaving your shuttle in the open shed, loosen your tension nut and move the peg
slightly to the rear, until the threads loosen, tighten the peg.
Grasping the finished part of your weaving in your left hand and the loose threads
right below in your right hand, pull down with the left hand while pushing up with
the right hand, this should move your work around the loom.
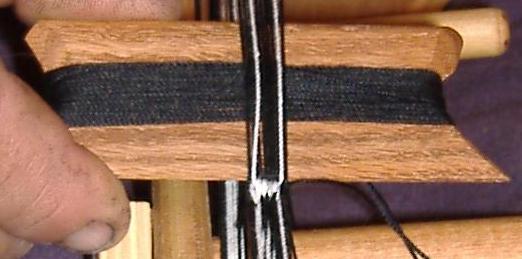
Move your finished weaving down to the top of the loom frame as shown on the left,
then push it back up about 1/4 inch to stand your heddles back up as shown on the
right, then loosen your tension nut and slide the peg towards the front of the loom
until the threads are snug, then tighten the nut.
Continue weaving and advancing your work until you can no longer make a shed
and throw your shuttle.
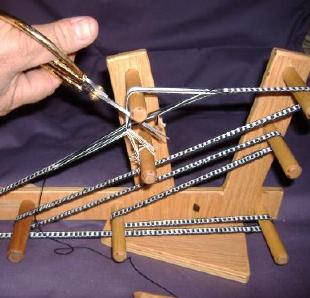
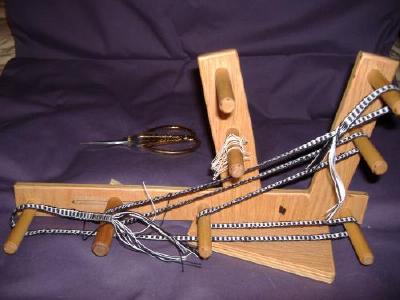
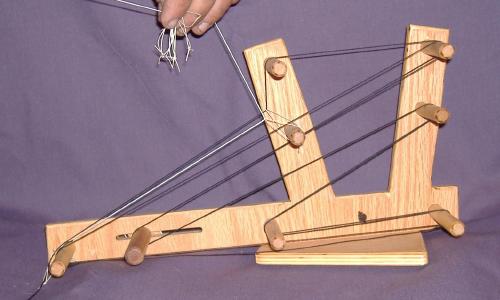
Now for the traumatic part, place your scissors above the heddles between the two
pegs as shown. Cut all the warp threads to release your band from the loom. Be
sure to cut the weft thread loose as well. Save your heddles as you will reuse them
next time.
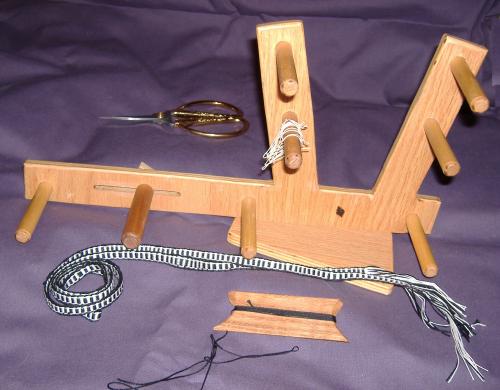
Your finished inkle band and your loom ready to be warped with your next project.
Now that you are ready here are a few simple patterns.
Have a question? feel free to e-mail us for a little extra help, Thanks Gary
See what's available at this time.
Copyright Gary Palmer
All rights reserved.

Free counters provided by Andale.